theme project

|
|
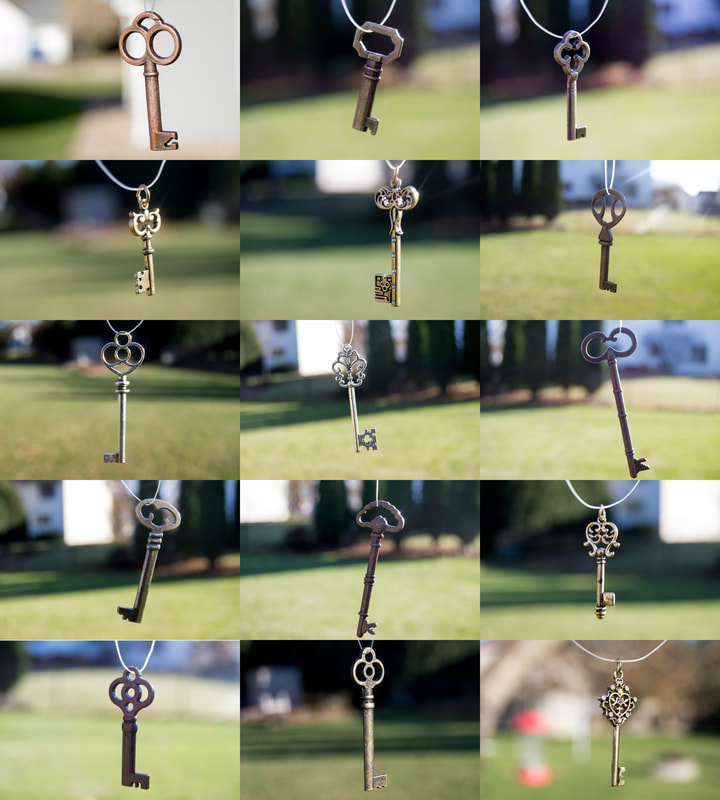
Sometimes it helps to have a theme to keep our mind and interest engaged with our photos.
It gives us purpose and a reason to look differently at things that we might have already
photographed. Be specific in your theme so that it is obvious that the photo series was
taken with particular intent.
A theme might include: classic cars, your hometown, homeless people, hats,
mittens/gloves, shoes/boots, lunch boxes/bags, backpacks, eye glasses, chairs, lights,
houses, buildings, bridges, streetlights, hood ornaments, wheels, pencils/pens, art supplies,
vending machines, uniforms, etc. The list can go on and on. The idea is that your theme is
specific but still gives you enough latitude to take interesting photographs. Think about
common subjects/objects that vary widely.
Make sure the focal point is clear to the viewer so your photo is a success.
Adobe Bridge Work:
Adobe Photoshop Work:
Here is a video to show you what to do if needed:
https://youtu.be/OIt57DQIksE
*This video shows an old resolution when starting the new file canvas - be sure to have it set for 300 p/i (which should be default)
*No audio - just read the notes and follow along
It gives us purpose and a reason to look differently at things that we might have already
photographed. Be specific in your theme so that it is obvious that the photo series was
taken with particular intent.
A theme might include: classic cars, your hometown, homeless people, hats,
mittens/gloves, shoes/boots, lunch boxes/bags, backpacks, eye glasses, chairs, lights,
houses, buildings, bridges, streetlights, hood ornaments, wheels, pencils/pens, art supplies,
vending machines, uniforms, etc. The list can go on and on. The idea is that your theme is
specific but still gives you enough latitude to take interesting photographs. Think about
common subjects/objects that vary widely.
Make sure the focal point is clear to the viewer so your photo is a success.
- Step 1: Pick your theme.
- Step 2: Photo shoot. Shoot at least 15 good photos of your theme. Take pictures all landscape or all portrait, do not mix the directions. Depending on your theme, this might take a little longer or you might hit the jackpot. Be creative with your photos. Give us a new perspective of something we have probably seen a thousand times.
- Step 3: Edit your photos. Adjust the exposure, contrast and crop your photo to best focus on the subject.
- Step 4: Compile your photos into a collage/poster (see more directions below). Turn the final product into the Assignment Turn-in Folder in your class on the G:Drive.
Adobe Bridge Work:
- view your photo files to check quality
- if adjustments are needed - right click on the photo in the main viewing window and select Camera Raw. Here you can easily adjust your photo to improve the quality. Remember - you can NOT fix focus.
- When done with Camera Raw be sure to save your photo - bottom left corner.
Adobe Photoshop Work:
- Start a new file
- CANVAS SIZE:
- 18x20 (for landscape theme photos)
- 20x18 (for portrait theme photos)
- Resolution: 300 p/i (this is default and what we will use the whole class)
- Open your them photos
- adjust image if needed (maybe do this with Camera Raw in Adobe Bridge)
- crop all photos to 4x6 or 6x4
- copy them to your Theme file by dragging and dropping
- Arrange all photos neatly in your Theme file
- Turn in a copy when done (just keep it a Photoshop file, which is a .psd extension)
Here is a video to show you what to do if needed:
https://youtu.be/OIt57DQIksE
*This video shows an old resolution when starting the new file canvas - be sure to have it set for 300 p/i (which should be default)
*No audio - just read the notes and follow along
